Welcome to our guide on changing brake pads! Ever wondered how long does it take to change brake pads? You’re in the right spot. This guide is for those thinking about a DIY brake job or curious about brake pad replacement time.
Replacing brake pads is key to keeping your car safe and running well. It’s a job that can save you money on big repair bills. It takes about 45 minutes to 2 hours, and it’s not too hard, rated as a 2 out of 5 in difficulty. Knowing when to change your brake pads boosts your car’s safety and your confidence in doing it yourself.
Key Takeaways
- The time to change brake pads can range from 45 minutes to 2 hours.
- A DIY brake pad change is rated as a 2 out of 5 in difficulty.
- Essential tools include a lug wrench, C-clamp, and safety glasses.
- Regular brake pad maintenance is crucial for vehicle safety.
- Changing both brake pads and rotors together is often recommended.
- Watch for signs like squeaking or grinding to know when to replace pads.
Understanding Brake Pad Replacement
Brake pads are key to your car’s brakes. They help stop your car safely and well. Knowing about brake pads and regular checks keeps your car running right.
What Are Brake Pads?
Brake pads are a big part of your car’s brakes. When you hit the brake, they press against the rotors. This creates the friction needed to slow down or stop.
Importance of Regular Maintenance
Regular brake checks are vital for safe driving. They prevent big problems and save money. Cars should get brake pad checks every 30,000 to 35,000 miles in the city.
Ignoring brake pad care can make braking worse. If pads get too thin, you need a pro to fix it. Also, smooth driving helps brake pads last longer and keeps you safe.
| Driving Type | Recommended Brake Pad Replacement Mileage |
|---|---|
| Urban Driving | 30,000 – 35,000 miles |
| Highway Driving | Up to 60,000 miles |
| City Driving (Bridgestone Recommendation) | As early as 20,000 miles |
Signs That You Need New Brake Pads

Knowing when to replace brake pads is key for safe driving. Regular checks for these signs can boost your car’s braking and safety. Here are the common signs of worn brake pads:
Squeaking or Grinding Noises
Squeaking or squealing sounds mean your brake pads are wearing out. When the pads wear thin, a metal part touches the rotor, making a loud noise. Grinding sounds while braking mean the pads are almost gone. Fixing this quickly stops more damage to your brakes.
Warning Lights on Your Dashboard
Modern cars have brake warning lights on the dashboard. These lights turn on when there’s a problem. Ignoring these lights can lead to bigger issues and higher repair costs. Always check your dashboard for these lights to keep your car safe.
Reduced Stopping Power
Noticing your car takes longer to stop is a big warning sign. This could be because your brake pads are worn or your brake fluid is low. These problems can hurt your car’s braking, so get your pads checked right away.
Knowing these signs can prevent accidents and save you money. Always check your brakes to keep your car safe and running well.
Tools Required for Changing Brake Pads

Changing brake pads needs specific tools and safety gear. This ensures the job is done right and safely. Here’s what you need for the job.
Essential Tools for the Job
- Car Jack and Jack Stands: Needed to lift the vehicle safely.
- Lug Wrench: Key for removing the wheel.
- C-Clamp or Brake Spreader: Helps retract the caliper piston.
- Basic Tool Set: Includes wrenches and screwdrivers.
- Torx or Allen Bits: Needed for caliper bolts.
- Brake Fluid: Important for topping off the system.
- Turkey Baster: Useful for removing brake fluid from the reservoir.
Safety Gear to Consider
Safety is key when working on DIY projects. Here’s the recommended safety gear:
- Mechanics Gloves: Protects hands from grime and cuts.
- Safety Glasses: Shields eyes from debris and brake dust.
- Coveralls: Keeps clothing clean and provides protection.
Having the right tools and safety gear is crucial. It makes the brake pad replacement process smooth. This lets DIY enthusiasts do the job well.
Preparing Your Vehicle for Brake Pad Change

Before starting a DIY brake job, make sure you’re in a safe place. The right spot helps with your vehicle safety checks for repairs. It also makes your project easier.
Choosing the Right Location
Find a well-lit area with enough room to move around. Debris or uneven surfaces can be dangerous. So, pick a good workspace.
- Flat ground to ensure stability.
- Good lighting to see everything clearly.
- Minimal traffic and distractions for safety.
Securing the Vehicle with Jack Stands
After picking the best spot, lift and secure the vehicle. Use a jack carefully. Always add jack stands to keep the car steady. These steps are key for safety:
- Disconnect the battery to avoid electrical problems.
- Use wheel chocks to stop the tires from moving.
- Check the brakes for wear or damage before starting.
Following these steps will help you have a safe and successful brake pad replacement.
Step-by-Step Guide to Changing Brake Pads

Many car owners can change their brake pads. This guide shows you how to do it right. It’s all about brake pad replacement steps for a DIY brake pad installation. It helps keep your car in good shape and teaches you about car repair.
Removing the Wheel and Tire
First, lift the car with a jack and use jack stands for safety. Then, loosen the lug nuts with a tire wrench. Remove the wheel and tire to see the brake assembly.
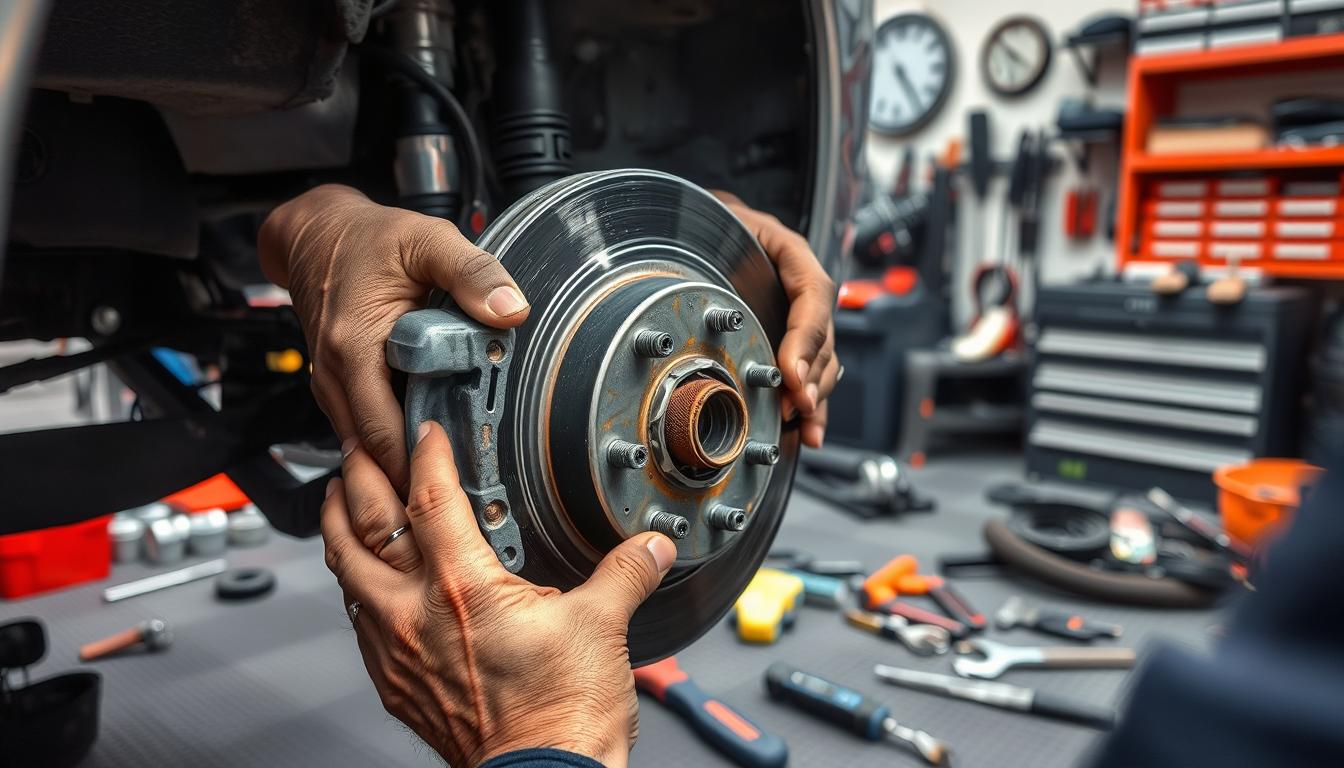
Taking Out the Old Brake Pads
With the wheel off, find the caliper. It has two to four bolts. Remove these bolts and hang the caliper aside. Take out the old brake pads and check their wear.
Installing the New Brake Pads
Before putting in new pads, check the brake fluid. Place the new pads in the caliper bracket. Make sure they’re right. Put the caliper back over the pads and tighten the bolts.
Reassembling and Testing
After putting in the new pads, put the wheel back on. Tighten the lug nuts in a crisscross pattern. Lower the car and test the brakes. Start the car and press the brakes to seat the pads. Test the brakes at low speeds to make sure they work.
How Long Does It Typically Take?

Knowing how long brake pad replacement takes is key for car care. The time needed can change a lot. This depends on the car type and who does the job. It’s important to know the difference between doing it yourself and getting a pro to do it.
Factors Influencing Time Required
Many things can change how long a brake replacement takes:
- Type of brake assembly: Cars have different brakes. This means some take more time than others.
- Experience level: A pro can do it faster than someone new. This shows how much time can vary.
- Extent of maintenance: If there are extra repairs, it takes longer. Simple jobs are quicker.
Average Time for DIY vs. Professional Services
DIY and professional brake jobs have different times:
| Service Type | Time Required |
|---|---|
| DIY Brake Pad Replacement | 1-3 hours (varies by experience) |
| Professional Brake Pad Replacement | 30 minutes – 1 hour |
| Brake Inspection | Approximately 30 minutes |
| Brake Fluid Change | 15 minutes – 1 hour |
| Complete Brake Caliper Replacement | 2-3 hours |
If you’re new to car repairs, it might take longer. A pro can do it faster. Knowing about brake care and the time it takes helps keep your car running well.
Common Mistakes to Avoid

Changing brake pads is a key maintenance task. Yet, many people miss important steps that can cause big problems. Knowing these mistakes helps keep your brakes working well and keeps everyone safe. By avoiding these errors, you can make brake pad replacement easier and safer.
Skipping Safety Precautions
One big mistake is ignoring safety when working on brakes. Always wear goggles and gloves. Make sure your car is on a solid surface and use jack stands for extra safety. These steps help prevent accidents and make your work area safer.
Incorrectly Installing Brake Pads
Putting brake pads in wrong can cause many problems. It’s important to use pads that match your car’s original equipment. Don’t forget to use shims and anti-rattle clips, as they help with noise and performance. Also, make sure the pads are aligned right with the rotors to avoid uneven wear.
Using safe brake installation practices helps your brakes work best. After installing, do the brake-in procedure. This involves gently pressing the brakes a few times. It helps the pads make smooth contact, reducing hot spots and uneven braking.
Post-Replacement Maintenance Tips

After changing your brake pads, it’s key to keep them in good shape. This ensures they last longer and work better. Regular checks and tests are crucial for safe driving.
Breaking In Your New Brake Pads
It’s important to break in new brake pads. This helps them work well with the rotors. Here’s how to do it right:
- Drive at moderate speeds.
- Apply brakes gently to avoid overheating.
- Gradually increase brake pressure over several stops.
- Avoid coming to a complete stop frequently during the bedding process.
Regular Assessment and Inspection
Keeping an eye on your brakes is important. Check your brake pads every 5,000 miles or before long trips. Look for:
- Thickness of pads (less than 1/4 inch indicates a need for replacement).
- Signs of uneven wear or damage.
- Unusual noises, such as squeaking or grinding.
- Vibrating brake pedals or difficulty in stopping.
Keep a log of your brake checks. This helps plan future maintenance and spots problems early. Regular checks keep you safe and save money on repairs.
| Inspection Item | Signs of Wear | Recommended Action |
|---|---|---|
| Pad Thickness | Less than 1/4 inch | Replace Brake Pads |
| Noise Level | Constant squeaking or grinding | Inspect and Assess |
| Brake Pedal Feel | Vibration or difficulty stopping | Professional Inspection |
Stay on top of brake pad care to keep your vehicle safe and efficient. Regular checks help spot problems early.
When to Seek Professional Help

Knowing when to get a mechanic is key for your car’s brakes. Some signs mean your brakes need a pro’s touch. Spotting these issues early can stop more damage and keep you safe.
Signs of Complex Issues
Here are signs you should get brake service fast:
- Unusual Noises: Sounds like squeaking, grinding, or vibrating when you brake mean parts are worn.
- Persistent Warning Lights: A light on your dashboard could mean more than just worn brake pads.
- Leaking Brake Fluid: Fluid leaks can make your brakes less effective, which is very dangerous.
- Vibrations During Braking: Feeling your car vibrate when you brake might mean brake discs are damaged or uneven.
Selecting a Qualified Mechanic
When looking for a trusted mechanic, think about these things:
- Reputation: Find shops known for good work and happy customers.
- Experience with Specialty Brakes: A mechanic who knows advanced brakes can find problems better.
- Transparency in Pricing: Make sure the shop gives clear prices that include everything, like rotor machining and slide pins.
- Quality of Parts Used: Pick shops that use top-notch parts to avoid early wear and tear.
Cost Considerations
Knowing the cost of brake pad replacement is key for car owners. Understanding average costs helps with budgeting for car repairs. Costs vary based on whether you do it yourself or hire a mechanic.
Average Costs for DIY vs. Professional Replacement
If you plan to do it yourself, brake pads cost:
- Organic brake pads: $20 to $70 per wheel
- Semi-metallic brake pads: $30 to $100 per wheel
- Ceramic brake pads: $50 to $150 per wheel
Replacing one wheel costs $50 to $150. For all four, it’s $200 to $600 or more. Dealerships charge $500 to $1000. Independent mechanics cost $200 to $500. Chain stores start at $150 to $300.
Budgeting for Brake Maintenance
It’s important to plan for brake maintenance costs. Here are some averages:
| Description | Cost Range |
|---|---|
| Replacement of brake pads per axle | $100 – $300 |
| All four brake pads | $200 – $600 |
| Brake pad and rotor replacement per axle | $250 – $500 |
| Total cost for brake job | $500 – $1000+ |
Choosing quality brake pads improves safety and lasts longer. This is a smart choice for car repair budgets. Remember, extra services like brake fluid flushes and caliper replacements can increase costs. Being informed helps prepare for brake maintenance expenses.
Conclusion
Understanding brake pad replacement is key for your car’s safety and performance. This guide has shown how to spot wear, use the right tools, and follow a simple process. Regular checks every 120,000 kilometers or six months can stop problems early.
If you like doing car maintenance yourself, replacing brake pads is doable and rewarding. It only takes 30 minutes to an hour. With the right tools and knowledge, you can do it well.
As you get better, think about your car’s brakes. DIY projects give you a sense of control. You’ll feel good about keeping your car safe and learning more about cars.
FAQ
How long does it take to change brake pads?
What are the signs that indicate I need new brake pads?
Can I change my brake pads myself?
What tools do I need to change brake pads?
How do I know when to consult a professional mechanic?
What’s the cost difference between DIY brake pad replacement and professional service?
What is the importance of regular brake pad maintenance?
What are common mistakes to avoid when changing brake pads?

Jack Thompson is a writer and seasoned auto mechanic with over 15 years of experience in the automotive industry. Known for his expertise in vehicle mechanics, Jack has a deep understanding of car and truck systems. His skills, honed through years of hands-on experience, have made him a trusted name in the field. Jack is committed to providing valuable insights into car maintenance and repair, helping vehicle owners keep their vehicles in top condition.